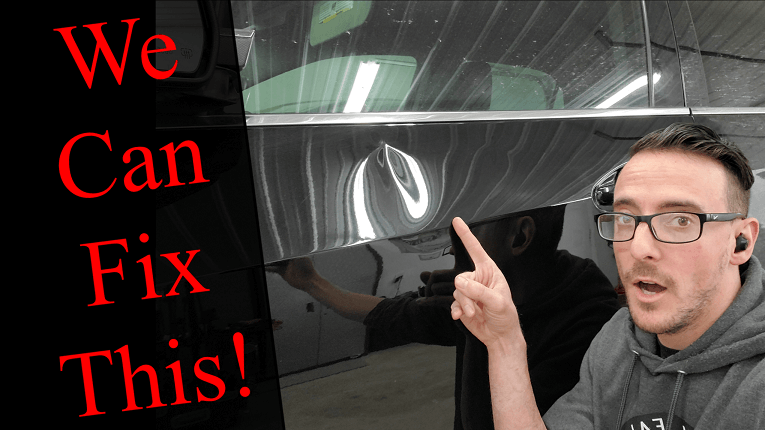
Today, we’ll be taking a look at a 2016 Chevrolet Equinox in need of a big dent removal, this has a pretty bad door dent in it. As you can see, the damage is quite severe and starts all the way near the top of the door and goes through the body line. There is even a bit of damage towards the bottom of the door which we will have to get rid of.
Starting Off, Cold Glue
To get some of the dent out from the door, we will be using a product called Cold Glue and it is available from Glexo. The Cold Glue tab is fastened to the Slide Hammer that we use here in the Sioux Falls Dent Repair shop and the tab is then applied to the damaged area. By simply pulling the Slide Hammer back and forth a few times, we can get some of the damage out.
Next, we switch over to hot glue pull tabs – something used quite commonly in the PDR world. The tabs we’re using for this job is from Black Plague and it is from the Ice Tab series. We’ll be using the Elim A Dent glue gun with Cam Auto Glue to pull out some of the remaining damage. The glue takes a little longer to dry, but it offers a better and stronger pull. To pull on the glue tab, we’ll be using the KECO K-Bar which gives us a lot of leverage when it comes to pulling on tabs and getting out dents.
With the help of the PDR lights, you can see how all that pulling got rid of the majority of that large dent in the door. Once we finish working on the door from the front, we can then remove the door, door panel and start pushing out the damage from the back. We also have to remove the glass, the reason being is this glass is special to this type of vehicle, find out what’s different about this glass by Clicking Here. After we remove the door panel, we gain a lot more access to the back of the door panel and this lets us push out the remaining damage with our tools.
After removing the door and placing it under the PDR lights, we can see how much of the damage is still left and we can then figure out the kind of tools we would require for the job. Moving over to the lower side of the door, we have to hammer down the damage with a special tool. It takes a multiple hits and quite a bit of time to get the damage out 100%, but it is still faster than taking the car to a body shop.
See A Real Demonstration Here:
If you want to know more about Sioux Falls Dent Repair, go ahead and follow us on:
This is a very good example of big paintless dent removal, Today we have Jack Bucknell with Sioux Falls Dent Repair working on this 2016 Chevy Equinox Right Front Door. This is some extreme damage to to repair using the paintless dent repair method. Unfortunately the customer was not sure what exactly caused this damage.
The Dent Removal Process
We started off this repair using some cold glue from Glexo. We then continued with our traditional hot glue pulling methods. Using Cam Auto glue dispensed with our Elimadent Glue gun, will evenly distribute this glue to our Black Plague Black Ice Oval Glue Tab. We then place the Tab on the dented area and use a leverage bar from Keco. This leverage bar is refereed to as the K bar from Keco Glue Pull Products. Using this bar, this allows us to slowly and very strongly pull on this damage. This bar allows us to make a very controlled pull with the glue to pull this damage out, verses a slide hammer. After me made some great progress with glue we then have to start the removal process. We eventually end up removing the door panel and door glass to gain access to the back side of this of this damaged area.
Why Did You Have To Remove The Glass Assembly?
This vehicle features laminated saftey glass in the front doors. There are many reasons we need to remove this style of glass for this repair. We have another article that touches on all of these questions and concerts.
After we have full access to the backside of the damaged areas, we can now push the damage out. We then use a series of tools to push the damage out as well as knocking down some of the high areas especially in the lower areas. We use many different styles of tools from many different tool manufactures to achive this type of final results. Some of the tools include Dent Craft, A1 PDR Tools, Ultra Dent Tools and Stanliner tools from Lithuania! Many of the knockdowns and hammer heads used are from Edgy Tools.
Closing Time
After we have the vehicle all put back together we have to run a Post Repair Diagnostic Scan. This is when we hook up a diagnostic computer scan tool to do a full system scan on the vehicle. The good old days of just taking a vehicle apart, putting it back together and just making sure the window rolls up and down are now gone. Many vehicle manufactures, including this one, REQUIRE a diagnostic scan to be done Pre, before any work is performed. As well as after any work is done. We have a great article outlining more about this whole entire process that you can view:
Learn more about each vehicle manufactures requirements on scanning here: