Lease Vehicle Turn In – Do This BEFORE You Return It!
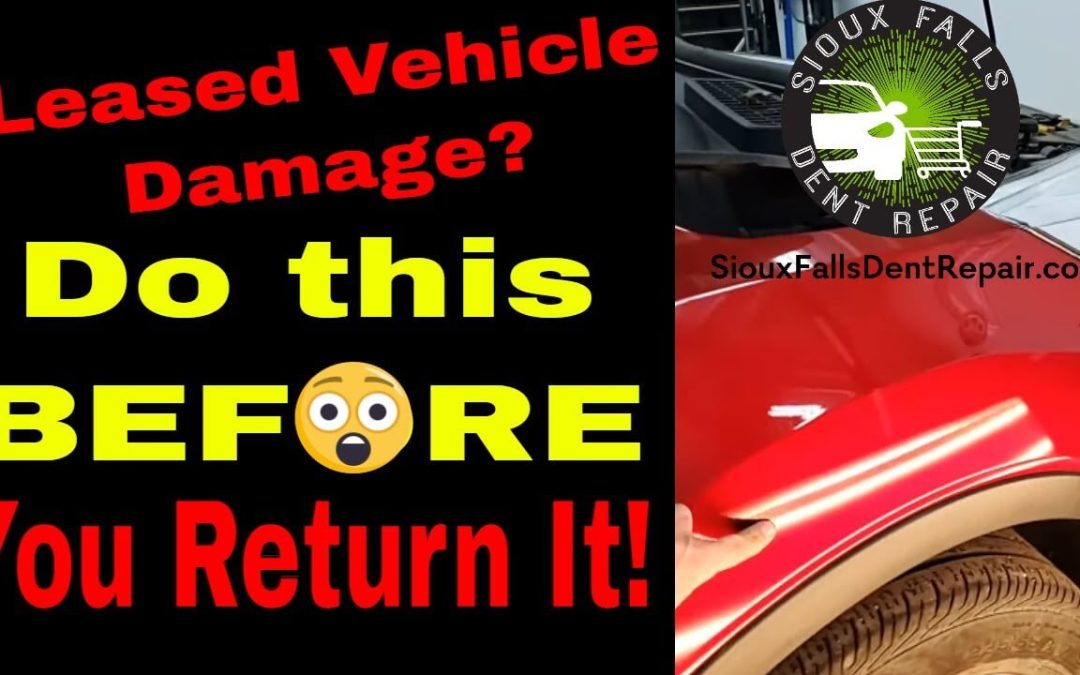
Today, we will be looking at a dent we took care of on a 2018 Ford Escape. If you do follow us on social media, you would have probably seen the picture I posted online that showcased the dent on the car. The car itself is a leased turn-in vehicle which means that the customer was already done with the lease and turned it into the dealership. However, they paid us directly to get the repairs done from us here at Sioux Falls Dent Repair.
When a person gets a car on lease and they damage the vehicle, they more often than not try and repair the car before they return the car back into the dealership. The reason for this is that the customer doesn’t want to be handed a lengthy bill when the car is returned. However, you should always check the lease agreements before taking any car as every dealer offers a different lease and allows different amounts of damage.
Moving over to the fender and the first thing that jumps out at us is the massive 16-inch crease dent. Under the PDR lights, the damage become quite obvious and we will be working on it today. Without the PDR lights, the dent is not really that visible, but it still is there and the customer wanted it out. Most of the scratches can and will be buffed out after we fix the dent.
If the customer took the car into a body shop, they would have been hit with a huge bill because the paint used on the car is extremely high quality. On top of that, Ford uses a colored clear coat on top of the Ruby Red that is used for this car. This adds to the cost of the repair when approaching a body shop.
Want to see what the repairs look like AFTER we are finished, just use the search feature to the left and search Lease, It will come up there.
Have a leased vehicle? Thinking of leasing a vehicle?
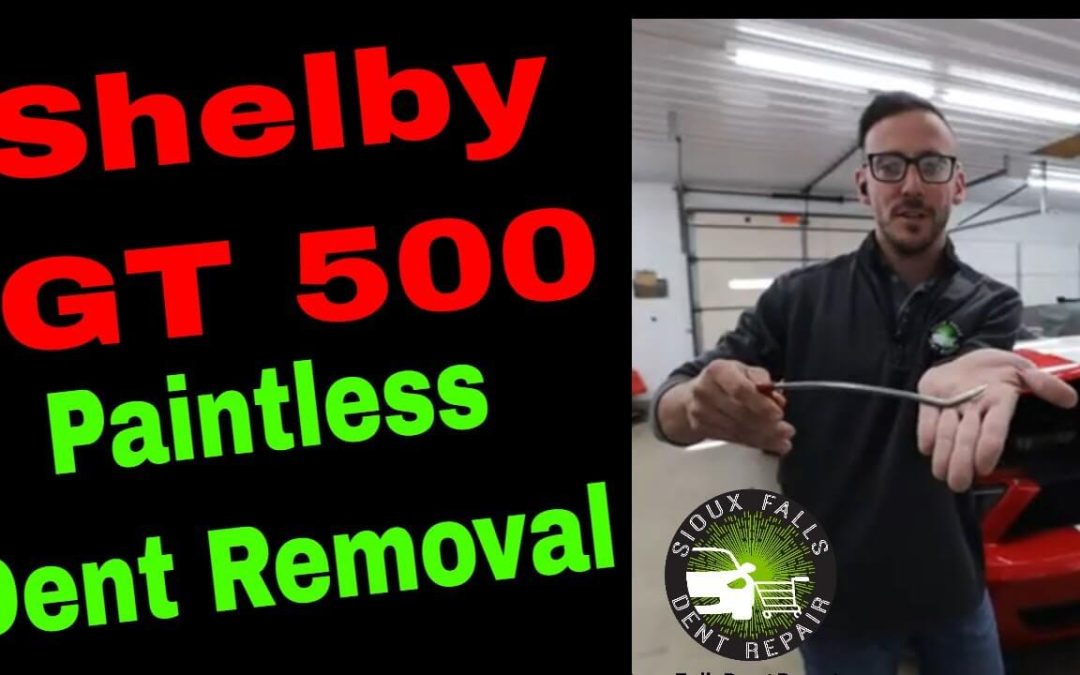
Shelby GT 500 Paintless Dent Removal- 2007 Ford Mustang
Today, we will be using paintless dent removal on a 2007 Ford Shelby GT500 Mustang to remove some dents in this aluminum hood. Even though the car is over 10-years-old, it has just under 2,100 miles on it. The damage is all on the hood and we needed to take off the hood pad or hood liner to gain access through the access points.
Some of the damage is hidden under the internal braces which means we had to use some special tools to push out those dents. The damage is actually about a 2-3 inch dent on a minor creased area which is on an aluminum hood. All these are the factors that go into pricing the dent repair job. The first thing we need to do is prop up the hood with a hood prop which allows us to gain access without having to close the hood completely. Next, we position the special PDR lights so that we can actually see the damage properly. The tool we needed to use here is an Anson Tequila Tool which helps reach under the hood and push out the dent gradually.
The first thing we need to do is prop up the hood with a hood prop which allows us to gain access without having to close the hood completely. Next, we position the special PDR lights so that we can actually see the damage properly. The tool we needed to use here is an Anson Tequila Tool which helps reach under the hood and push out the dent gradually.
How Do We Do It?
It actually takes a lot of tiny pushes to get the damage out – sometimes it can take over 100 pushes to get out a dent. We here at Sioux Falls Dent Repair DO NOT use hot water or compressed or magnets to get out the dents we deal with because they can all cause more harm than good to the car and simply do not work.
After the damage is taken out, we need to buff out any imperfections and clean up the area from any scratches and scuffs. Next, we need to apply a coat of anti-corrosion spray because we used a sharp metal tool to get the dent out from the back of the hood. Once the hood is sprayed properly, we can get the hood liner or hood pad back on and get the car ready for the customer.
If you have any queries or questions, leave them down in the comment section below. You can also call or text us at605-250-1023 and get a free damage assessment.
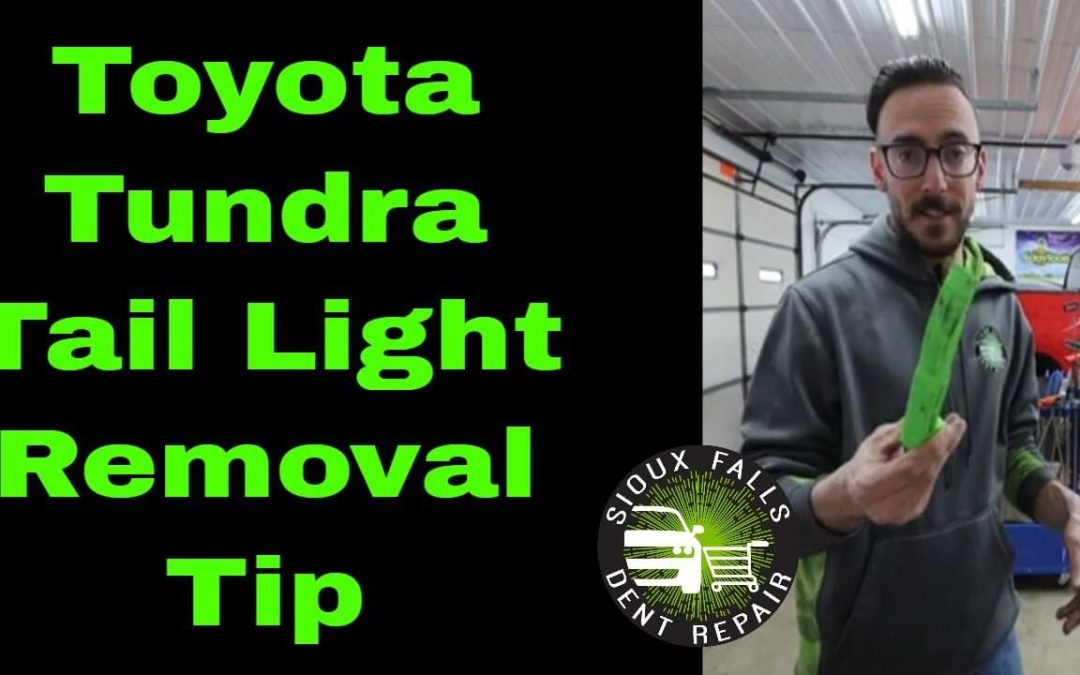
Today, Jack introduces us to the very first “Tool-Tech Tip Tuesday” episode and will take us through the steps of removing a tail light from a 2015 Toyota Tundra pick-up truck. There is a twist though, as Jack will not be using a traditional tool used for light uninstallations. Instead, he is using a window wedge from Stuckey Tools that creates a gap in the window channel – but it works, so why not?
Once the tailgate assembly is lowered, Jack shows us that two torx screws hold the tail light in place. Once those are out, Jack explains that there are a couple of guide pins that actually require the light to be pushed out sideways rather than pulled out from the back (as seen on older models).
This is where the window wedge tool comes in. Because the tool is made from plastic, there are no worries about scratching the paint or damaging the metal while removing the light. As you can see, Jack simply pushes the wedge tool into the seam of the light and it pops out easily.
If you have any damage and want us to take a look at it, reach out to us on 605-250-1023. You can also request a call back by Clicking Here!
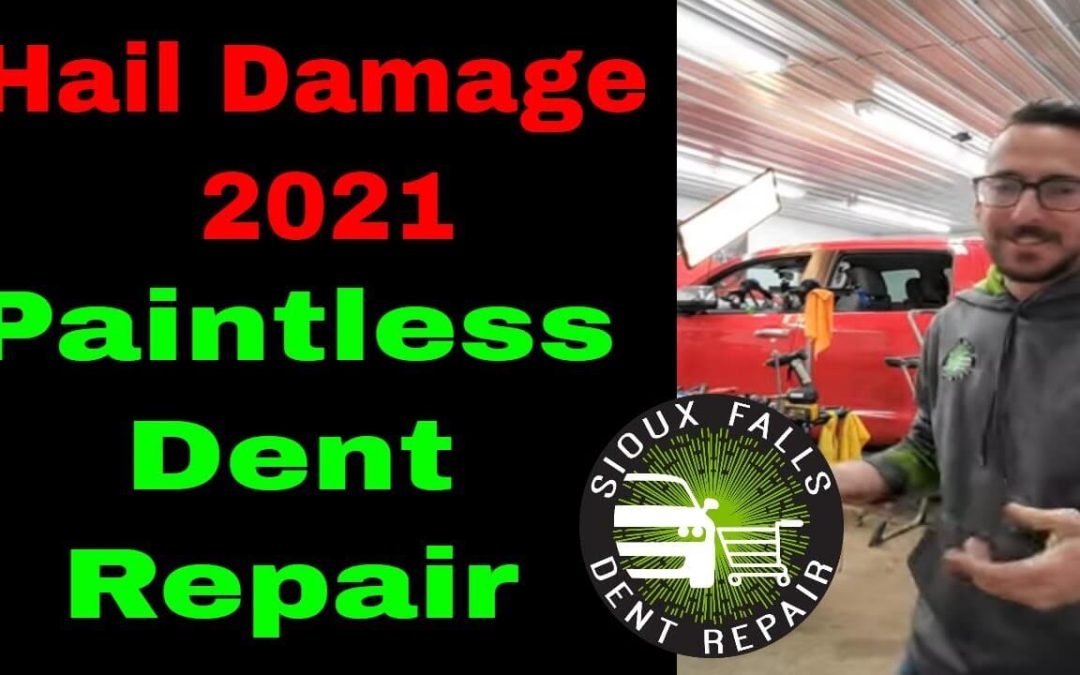
In today’s episode, Jack is going live on Instagram and is working on doing some hail damage repairs on this 2015 Toyota Tundra pick-up truck that came in from a body shop. The reason why the car was taken to a body shop was that it was keyed on the side and the owner was looking to have it repainted.
However, while the technicians were preparing the car for the painting process, they found a few dings and dents but it was only after washing the vehicle did they realize that there was severe hail damage on the car. Under the PDR lights, Jack shows us the extent of the damage and while the dents are mostly tiny, they are a lot of them. From the roof rail to the actual roof, the car was covered with dents but the body shop was more interested in getting the dents out from the panels that they were going to fix.
So, Jack explains that he will be working on the entire right hand side of the vehicle, especially on the roof rail.
If you have any kind of hail damage or dents that need to be removed, feel free to contact us through call or text at 605-250-1023.
You can also fill out a form online to have us contact you! Click Here!
Today, Jack from Sioux Falls Dent Repair will be taking on a huge dent repair on a 2015 Ford Edge. The dent is on the back liftgate below the license plate and runs through a body line in the back as well. There is also some minor paint damage that the customer was made aware of. Jack says that this is the perfect example of what PDR is all about and how much damage it can actually take out without having to repaint anything. Unlike a body shop, through the PDR method, Jack was able to take out the dent in about one day. Luckily, the customer brought the car in just after having it washed which made the repair process even faster.
Jack goes on to explain that there are certain OEM guidelines that have to be followed when dealing with any repair process. This vehicle, being a Ford, Jack had to run a pre-scan to ensure that he knew what was damaged before he could start working on it. To fix the dent on the liftgate, Jack has to remove the trim panel and disconnect the battery and explains why it is important to do a pre-scan in such cases. A pre-scan lets technicians know what is working and what is not before they start working on it so that they can either put it back the way it was or inform the owner and get it fixed (if possible). After Jack completed the pre-scan, he was greeted with 4 different codes – only for the area that he was going to be working on.
If you have any queries or questions, you can contact us multiple different ways: